
Remember, oh so long ago, when I promised to share a tutorial for these sweet padded hangers, covered in pretty fabric and decorated with a ribbon bow...?
Time flew by, and as the festive season delights mounted, my time became less and I almost forgot all about this promised sewing project...

I recently wanted to make a few padded hangers for a friend of mine who is expecting a new little blessing within the next few days, and thought I would make a couple more for my stall at the market...after all they are so lovely to make. Simple and effective which, as you know, I love!
Thus, without further ado, I introduce to you...the fabric covered hanger and some instructions and pictures for you ~ perhaps you may feel inclined to do a little sewing this afternoon or you need a gift for someone dear. And if you should experience any trouble with my instructions, please know that you are welcome to mail me anytime...I would be happy to lend a hand!

Oh, and the light was utterly terrible for taking pictures, so I do hope you will excuse the poor quality pictures in the tutorial, my friends...
~*~
You Will Need...
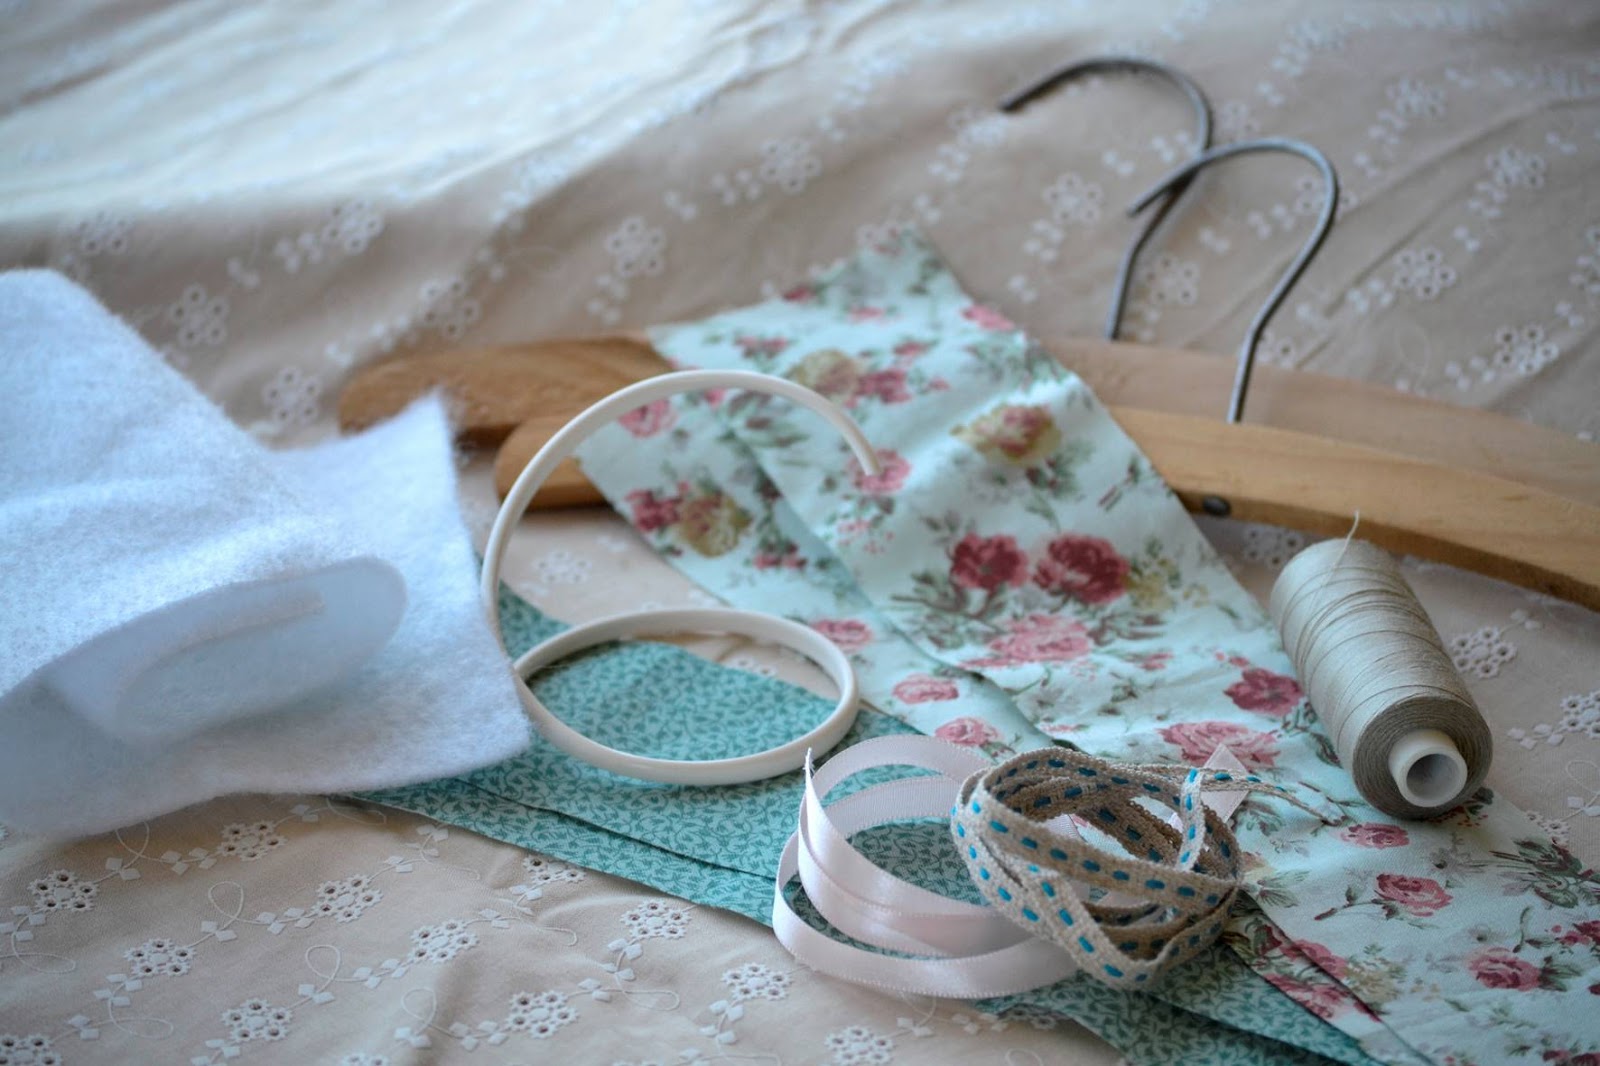
A wooden hanger measuring about 13cm x 2.5cm...adjust pattern accordingly if you have a hanger of a different size.
Quilting Cotton...the brighter the better!
Pretty Ribbon
Batting
Plastic Piping, for covering the wire hook of the hanger
Needle
Cotton
Sewing Machine
Iron and Ironing Board
Self-Healing Cutting Mat
Rotary Cutter
Ruler
To Make:
Begin by selecting the fabric you wish to use...I always work with 100% cotton, and I love having a collection of pretty quilting material as it is just oh so delightful to work in!
Padded hangers are sweet given in twos, so choose two coordinating fabrics as well as some matching ribbons...
Using your ruler, self-healing mat and rotary cutter, measure and cut fabric and batting pieces:
You will need two 13.5cm x 2.5cm pieces of patterned fabric, and one 5cm x 13cm piece of batting.


Now cut a piece of plastic piping for the hook of the hanger and slide it onto the hook...
Fold your batting in half lengthways, then in half widthways.

Make a mark where the middle is and pierce with the tip of your scissors or an awl to make a small hole. Slide the batting over the wooden hanger.


Make a mark where the middle is and pierce with the tip of your scissors or an awl to make a small hole. Slide the batting over the wooden hanger.

The next step is to wrap the batting around the hanger as shown in the picture...now thread your needle with a long length of cotton thread and roughly tack the batting to the hanger. The batting will not be seen, so don't be afraid to be messy...as long as it is securely attached to the wooden hanger, it is fine. {Can you spot my old needle...? I love it so much, I haven't the heart to find another to use!}

Now you need to sew the cover of the hanger... Pin fabric pieces together, right sides facing and stitch the sides and top, leaving the entire bottom length open. I used about a 1cm seam allowance all the way around.

Once sewn, fold the length of fabric in half and unpick about 3 stitches in the very middle - this is the hole which you will pull the hook through. You may want to reverse a few stitches on either side of the hole so as to stop the stitching unravelling...


Turn the cover right way around and using a hot iron, press the seams flat. Fold about 1cm of the fabric in all the way around the bottom edge - you will slip stitch this area closed once you've placed it on the hanger.

Slide the cover over the wooden hanger gently, pulling it into position. Pin the bottom edge closed and thread your needle with a length of cotton.

Slip stitch the area closed with neat, even stitches - if need be, fold the edges in a little on either side to form a better more fitted shape if you wish.

Tie a small ribbon bow around the hook of the hanger and use a dab of fabric glue to secure it to the hanger and stop it from sliding off.
...And there you are...a pretty padded hanger, in all its lovingly handmade glory!
~*~


I have added a few pretty padded hangers to my little Etsy shoppe, heartmade, if you'd prefer to purchase them ready made by me... I love sending special packages to others, and it is a true delight to share what I have such fun making through my shoppe!
~*~
If you decide to make a couple of your own, do let me know the outcome in the comments section below...how it makes my day to hear from each of my dear friends, and I warmly welcome any new readers and hope you will be blessed and inspired as you visit with me!
With many blessings on this last beautiful day of February, sweet readers...

~
This post may be shared with...
15 comments:
These are beautiful! I still have my mother's padded hangers and they're a treasure.
Sweetest Kelly-Anne, thank you ever so much for the lovely tutorial! I have quite a few wooden hangers and this would be the perfect thing to do with them. You are a sweetie for showing us how to make them.
Have a glorious week, my friend. Love and hugs!
This post seems just made for me !
I have to put a few hanger in the bedrooms of our Short Lets and I wanted to make them with fabrics intonated to the colours of each room ... that's a work I thought to devote myself to during this Winter, so I have to hurry, Spring is around the corner !
Thank you my precious friend, you're always a blessing to me!
Sending love to you, my dearest, wonderful Kelly-Anne,
and smiles, and hugs ... and gratitude ... alwyas !
Dany
I love padded hangers and you've done such a nice job with the tutorial. I'll try to make some soon. I put one of your bunnies in my Etsy favs. Enjoy your week sweet friend. Hugs, Diane
What a lovely idea, Kelly-Anne! I love the fabrics you chose as well- so pretty! :) This is the perfect way to add a little beauty to old hangers....adding this idea to my mental list of things to try!
Hope all is well with you and your dear family! Thinking of you, dear friend, and hoping your sweet mom is doing well...
Much love and many hugs always,
Libby
Dear Kelly-Anne, Your pretty padded hangers are beautiful. Love the fabric and thank you for sharing your wonderful tutorial. You are so talented my friend.
Wishing you a wonderful month of March. Blessings xo
Kelly-Anne...these are quite beautiful...and so very feminine! Thank you for the tutorial...they look quite easy to make! I hope your week is off to great start :)
Oh dear Kelly-Anne.. always such a delight to visit here, and be inspired! I do have some clothes hangers that would be spruced up so prettily with your tutorial! Thank you for sharing such a beautiful, quick and easy way to make the padded hangers! Yours turned out so beautifully. I do hope all is well with you and your precious mother as you await little man's arrival! Keeping all of you in my prayers!
Your hangers are just gorgeous and such a lovely gift they would make too, thanks for sharing how you make them!
Kelly Anne,
Your hangers are very sweet and what lovely gifts they make! I make them too but have never used that plastic piping before. I really like it and will have to look around for it. You always use the prettiest fabrics. Hope all is well!
xo
Linda
These are just daring and would make a wonderful gift in a set of three! :)
Hello Kerry-anne,
Happy Saturday to you. What a fun and beautiful project. I love love this. A very clever and inexpensive idea to beautify ones closet.
The fabrics are gorgeous.
Have a wonderful rest of the weekend.
Janet
So lovely, where did you find the plastic covering part. Does it have a name? They are so sweet. Thank you for sharing this post. I'm a new follower please join me. With live Janice
Just adorable dear one. I am so glad your package arrived safe and sound! I was so happy to send it your way. How is your mama doing?
So pretty Kelly Anne, what a difference a padded hanger makes. I have a girlfriend who makes these also. lovely work.
Post a Comment