Showing posts with label Gifts. Show all posts

Thursday, May 19, 2016

Thursday Pearls {& a Sale on Selected Heart❤made Products!}

 
 "Neither go back in fear and misgiving to the past, nor in anxiety and forecast to the future:  but lie quiet under His hand, having no will but His."  

~ H.E. Manning 

~
A precious friend of mine sent me this quote in a lovely letter the other day...I found it beautiful and truly encouraging to my heart...may it bless you too, dear reader...

"As the hart panteth after the water brooks, so panteth my soul after thee, O God."

~ Psalm 42:1

~
In other news, I am busy clearing old stock in the shoppe at the moment...  How about visiting Heart❤made this morning and doing a little shopping for a sweet friend, new baby or even for yourself...?  I am having a sale on my sweet hessian jointed bunnies.  They make such lovely little gifts and would cheer any bookshelf or bedroom!  I would love to send a package of happiness your way...{{smiles}}

They have been marked down from $8.00 to only $6.00, so do pop over and have a look!


 May the Lord bless each of you with a wonderful day and may He fill you with His blessed joy!

With love in Christ,

Friday, April 15, 2016

Gorgeous New Items in the Shoppe...

Hello dear readers...happy April to you!
I know that many of you are enjoying the arrival of Spring, whereas here in the southern hemisphere, Autumn is being welcomed with open arms!
Truly, the cooler days are a gift after a very warm summer, and even my garden is growing ever so beautifully with the rain and cool days we have received lately...

Although I have not been the most consistent of bloggers over the past month or so, my hands have not been idle...  Ah, quite the contrary in fact...

My sewing machine (or rather my mother's which I am blessed to be using till I purchase my own) has been whirring almost every day, and I am glad to announce that our baby's nursery, or rather ''corner'' is complete and that all I set out to do in regards to decor is done!
Stay tuned for a reveal post coming soon...{{smiles}}

In between taking care of the smooth running of the household and doing some delightful pleasure sewing, I have also re stocked my little Etsy shoppe with a few lovely new items!  What a joy it to send packages of love across the world to sweet customers!  

And because I simply love what I do and enjoy bringing a smile to a person's face through my handwork, I have added a couple more items to my shoppe as well as one or two new things...I hope you will pop over and take a look...

https://www.etsy.com/shop/HeartmadeSouthAfrica?ref=l2-shopheader-name

You will find...

Whale softies for baby boys and girls...


Sets of two padded fabric hangers...


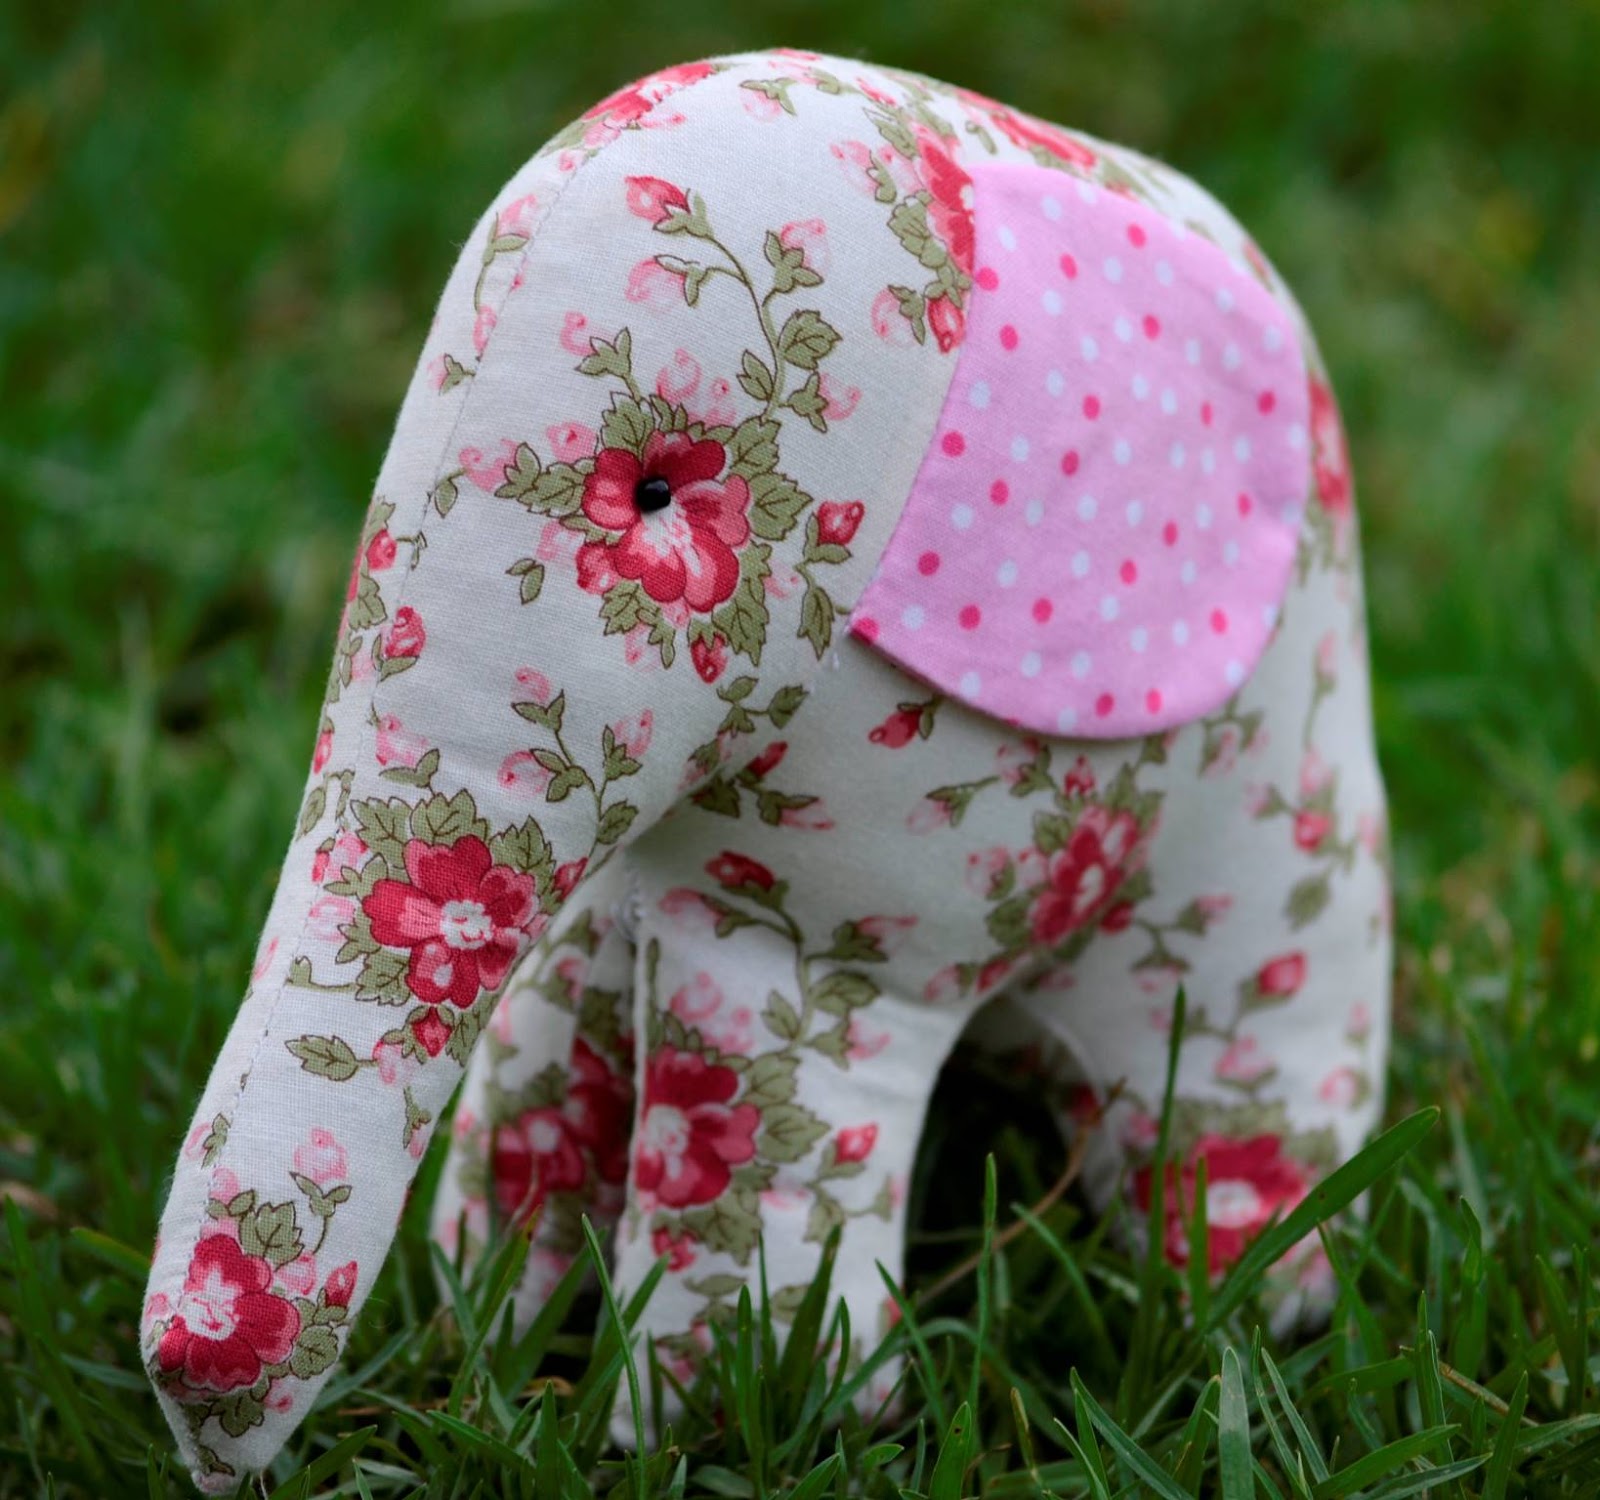
Ellie softies...


 A patchwork cushion with cross stitch motif...


...and ribbon taggy balls!


Can you tell I am enjoying making baby items at the moment...?  {{smiles}}

~
I am sure you must be wondering whether our baby brother has made his grand entrance yet...not yet I am afraid!  We are so eager to meet this little fellow, but babies will come when they're ready...{{smiles}}  I look forward to sharing his birth announcement very soon...:)

In the meantime...I have a special gift to you ~

When you make a purchase of $25 or more and enter the coupon code APRIL16, you will receive $4 off your entire purchase!  This coupon code is valid until the end of April and is especially for my blog readers!  Visit HeartmadeSouthAfrica on Etsy HERE!

Blessings dear friends!

Monday, February 29, 2016

How~to~make Fabric Covered Hangers

Remember, oh so long ago, when I promised to share a tutorial for these sweet padded hangers, covered in pretty fabric and decorated with a ribbon bow...?
Time flew by, and as the festive season delights mounted, my time became less and I almost forgot all about this promised sewing project...


I recently wanted to make a few padded hangers for a friend of mine who is expecting a new little blessing within the next few days, and thought I would make a couple more for my stall at the market...after all they are so lovely to make.  Simple and effective which, as you know, I love!

Thus, without further ado, I introduce to you...the fabric covered hanger and some instructions and pictures for you ~ perhaps you may feel inclined to do a little sewing this afternoon or you need a gift for someone dear.  And if you should experience any trouble with my instructions, please know that you are welcome to mail me anytime...I would be happy to lend a hand!


Oh, and the light was utterly terrible for taking pictures, so I do hope you will excuse the poor quality pictures in the tutorial, my friends...

~*~
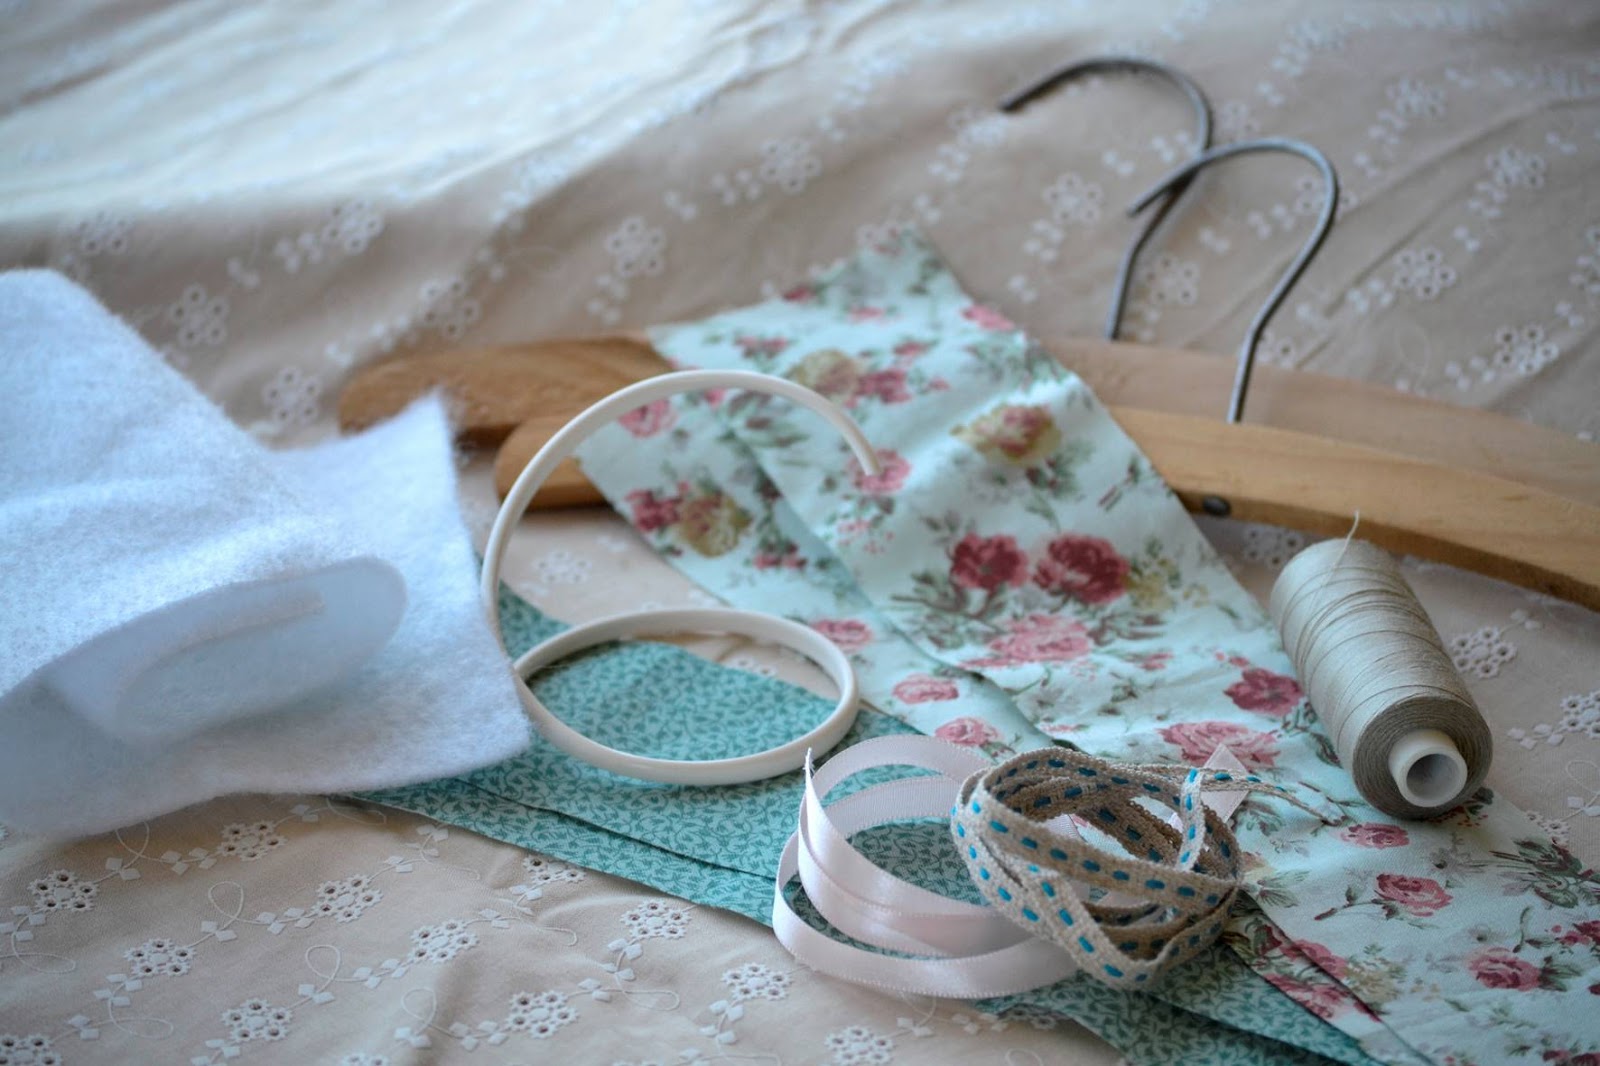
You Will Need...


A wooden hanger measuring about 13cm x 2.5cm...adjust pattern accordingly if you have a hanger of a different size.
Quilting Cotton...the brighter the better!
Pretty Ribbon
Batting
Plastic Piping, for covering the wire hook of the hanger 

Needle
Cotton 
Sewing Machine
Iron and Ironing Board
Self-Healing Cutting Mat
Rotary Cutter
Ruler

To Make:
Begin by selecting the fabric you wish to use...I always work with 100% cotton, and I love having a collection of pretty quilting material as it is just oh so delightful to work in!  
 Padded hangers are sweet given in twos, so choose two coordinating fabrics as well as some matching ribbons...
Using your ruler, self-healing mat and rotary cutter, measure and cut fabric and batting pieces:  
You will need two 13.5cm x 2.5cm pieces of patterned fabric, and one 5cm x 13cm piece of batting.
 

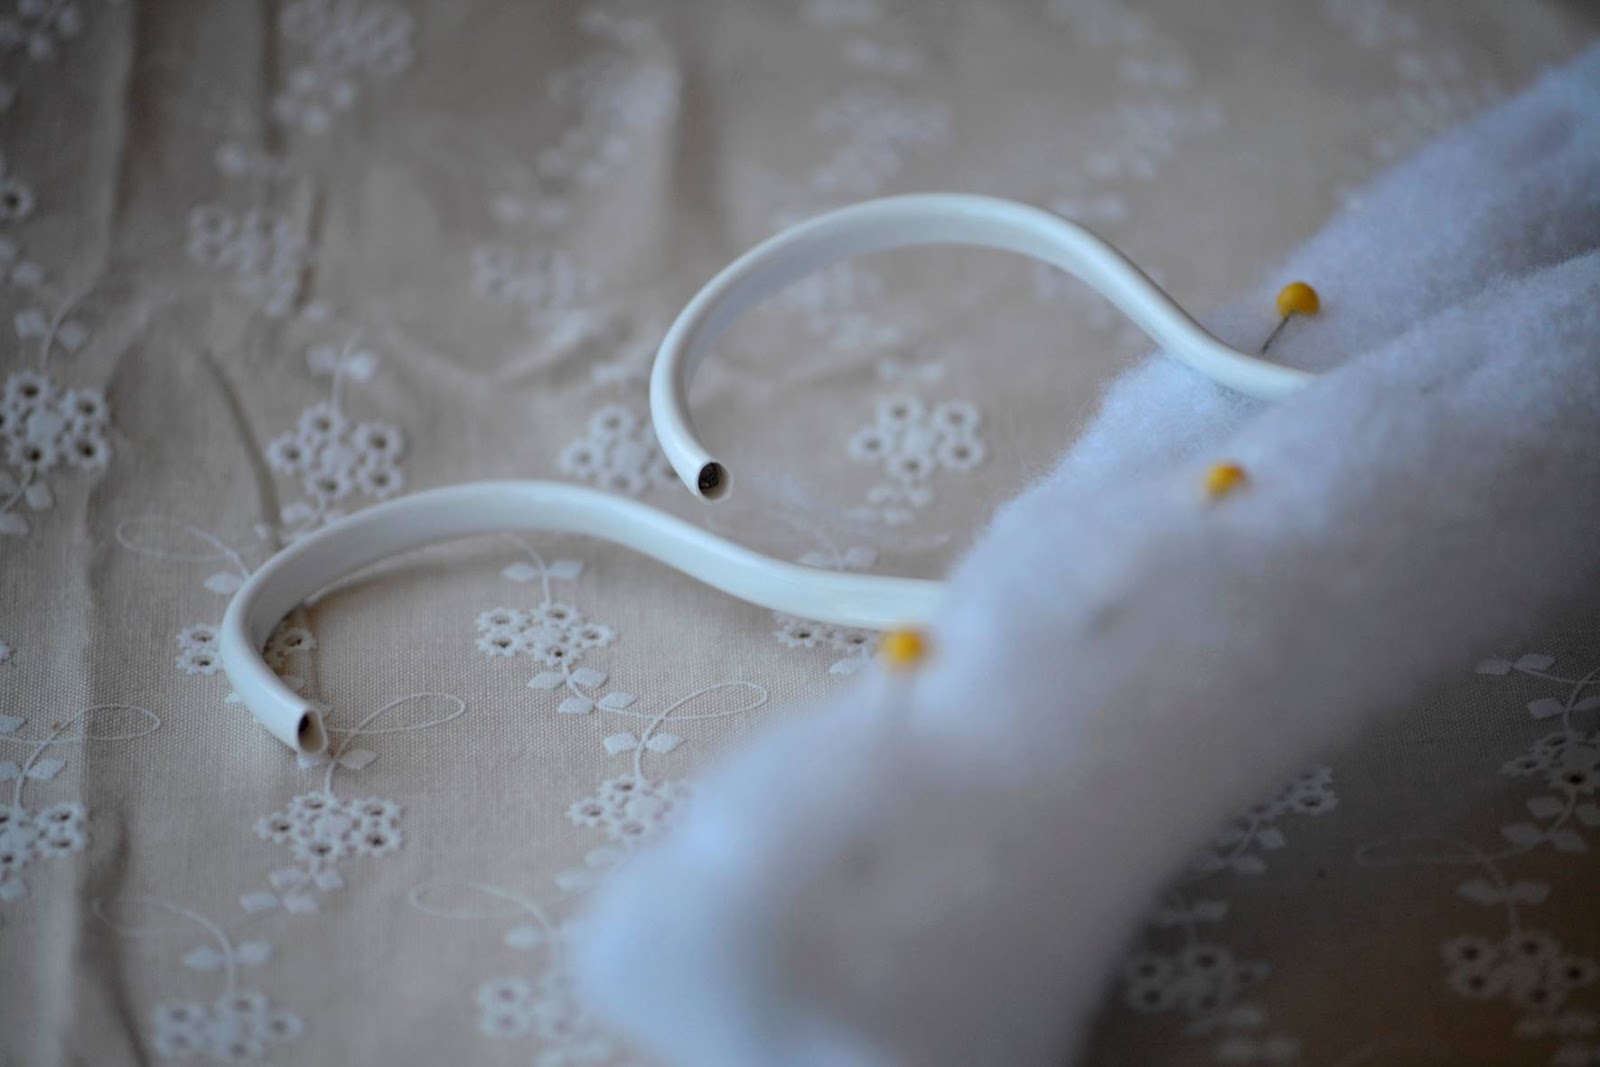
Now cut a piece of plastic piping for the hook of the hanger and slide it onto the hook...
Fold your batting in half lengthways, then in half widthways.


Make a mark where the middle is and pierce with the tip of your scissors or an awl to make a small hole.  Slide the batting over the wooden hanger.
 

The next step is to wrap the batting around the hanger as shown in the picture...now thread your needle with a long length of cotton thread and roughly tack the batting to the hanger.  The batting will not be seen, so don't be afraid to be messy...as long as it is securely attached to the wooden hanger, it is fine.  {Can you spot my old needle...?  I love it so much, I haven't the heart to find another to use!}
   

Now you need to sew the cover of the hanger...  Pin fabric pieces together, right sides facing and stitch the sides and top, leaving the entire bottom length open.  I used about a 1cm seam allowance all the way around.


Once sewn, fold the length of fabric in half and unpick about 3 stitches in the very middle - this is the hole which you will pull the hook through.  You may want to reverse a few stitches on either side of the hole so as to stop the stitching unravelling...
 

Turn the cover right way around and using a hot iron, press the seams flat.  Fold about 1cm of the fabric in all the way around the bottom edge - you will slip stitch this area closed once you've placed it on the hanger.


Slide the cover over the wooden hanger gently, pulling it into position.  Pin the bottom edge closed and thread your needle with a length of cotton.


Slip stitch the area closed with neat, even stitches - if need be, fold the edges in a little on either side to form a better more fitted shape if you wish.
 

Tie a small ribbon bow around the hook of the hanger and use a dab of fabric glue to secure it to the hanger and stop it from sliding off. 
...And there you are...a pretty padded hanger, in all its lovingly handmade glory!

~*~

I have added a few pretty padded hangers to my little Etsy shoppe, heartmade, if you'd prefer to purchase them ready made by me...  I love sending special packages to others, and it is a true delight to share what I have such fun making through my shoppe!

~*~
If you decide to make a couple of your own, do let me know the outcome in the comments section below...how it makes my day to hear from each of my dear friends, and I warmly welcome any new readers and hope you will be blessed and inspired as you visit with me!

With many blessings on this last beautiful day of February, sweet readers...

Saturday, February 6, 2016

Blessings....

My heart is filled with gratitude for all the precious sisters in the Lord I have been blessed to meet, and I daily thank Jesus for allowing me the true privilege of writing on Beautiful Girlhood as well as forming the most wonderful friendships along the way!

Yes, my friends...I have returned from my little blogging rest.  I simply missed you all too much and had far too much I wanted to share with you.  I do think my blogging schedule may tighten up somewhat over the next few weeks as my dear mother approaches her due date, but I want to write oh so much that I will stop by when I can!

In my absence I have been working on several posts including a little tutorial I promised months ago, so all my sweet readers who love to sew, and even those who have limited sewing skills, do stay ''posted'' for a lovely and simple project which will only take about half an hour, coming soon!

~
I wanted to show you some of the most delightful gifts given to me by some very dear friends lately, both those that I have met and those that I haven't {yet}...isn't it remarkable that we can enjoy sweet fellowship with those we have never met in person before...?  The love of Christ unites us, and it is a joy to behold indeed!


 My dear pen friend, Ashleigh, blessed me with the most delightful Christmas parcel...just look at some of the treasures she wrapped up for me...it is such a JOY to write to Ashleigh, and she does write the most delightful letters back...{{happy sigh}}.  She made this adorable birdie brooch for me...isn't it too cute?  And see the crocheted doily behind it...so beautiful!
 

Oh, and Mildred, whom I have truly enjoyed getting to know better over the past few months, sent me these beautiful vintage hankerchiefs...aren't they pretty?  I am collecting lovely hankies as they make such wonderful tray cloths, don't you think so too?  I think my favourite is the ladybird one on the left!  {{smiles}}  Mildred, you have impeccable taste! 
 

 My sweet friend who lives just down the road gave me this charming blue tea cup...look at the design on it...  The two of us decided to throw a baby shower for a mutual friend who is expecting a second little blessing soon...  It was so enjoyable to plan together and then finally watch the event unfold...  Thank you, Beverley...I do love this tea cup so!
 

And on Monday my dad came home carrying a beautiful package of birthday blessings from my dear friend, Cheryl...not only did she send me a book filled with the most fantastic ideas for card making, but she added all sorts of goodies including a little book of ''home'' quotes, handwritten notes and a pretty tea cup coaster made by Stephanie...I am busy planning my sewing ''corner'', and I intend to have this pretty coaster on my table for that daily cup of tea!  
Dear Cheryl...you blessed me more than you could ever know...thank you!

The post office has been quite busy with mail for me lately, and I simply have to smile...I have heard the term ''happy mail'' used for exciting things that come through the post office, and I can certainly say this is what I have received lately...  
If you are unsure of whether to begin exchanging letters and gifts with other ladies across the world, may I encourage you to give it a try?  I can assure you that it will be a delightful experience - there are so many precious ladies with generous hearts, it makes me smile to think about it!

~
Now I must be off...tomorrow is market day, and I am looking forward to meeting a friend for coffee while my sweet sister, Nancy, looks after the goodies at our stall.  I have quite a few products to show you, but all in good time...I could continue writing for ever so long, but I am sure you have lots you would like to do on this Friday morning!

Have a blessed and creative weekend, sweet friends!
 

 ~
 Oh, and have you entered my little ''love'' giveaway yet?  It is still open to all readers across the globe...if this is your first time visiting Beautiful Girlhood, please don't let that hinder you...the more the merrier, and you are most welcome here!  I warmly invite you to stop by this post to join in the giveaway delights...

Saturday, January 16, 2016

Soap, Delightful Soap ~ A Few Simple Ideas


Remember how I told you we finally attempted soap making after so many years of dreaming about it, dear friends…?

Well, I thought I would share some pictures of our little soaps with you, and also some sweet and simple ideas for wrapping them beautifully…


 Soaps make such wonderful presents, particularly as hostess gifts!

Don’t you just love the smell of all natural soap…?


I will let you in on a little secret…we found some wonderful natural soap base from a local soap company (The Soap Barn), and thus our soap making experience was simple and very enjoyable!


Although I would very much like to try making soap from start to finish someday, I am quite happy to potter about with nothing but essential oils, some dried herbs/flowers and ready-made soap base – yes, in this instance, I am happy to “cheat’’ a little – for now, anyway!  {{smiles}}


~

I have included our recipe for you should you wish to make your own sweet soaps…I found it in the lovely Ideas magazine, November 2015...I did ''tweak'' a few things, though...

~ Simple Soap ~

You will need...
  
white soap base (the 'melt and pour' variety)
dried rose buds
rose essential oil
red food colouring
mould
spraying alcohol

To make...

Cut the soap base into 1 x 1 cm cubes and place in a thick-based pot over a very low heat, stirring constantly till melted.  
Use a metal spoon or spatula to stir, placing it in a jug of warm water when not using to prevent the soap residue from hardening.
Mix a few drops of the essential oil into the soap base and stir to combine.
Dip the tip of a wooden skewer or toothpick in the food colouring and then into the soap.  
Stir again and repeat to add more colour, if you prefer.
Transfer the coloured soap mixture to your mould, and spray with alcohol to prevent bubbles from forming on the top.
Leave to stand for a few hours until set.  
Before the soap sets completely, make holes in the surface using a wooden skewer and insert rosebuds into the holes.
Leave the soap to stand overnight to harden completely. 
Turn the soap out of the mould the next day and cut up.

~ A Few Wrapping Ideas ~  


One of my favourite ways to wrap soaps is to use fabric and ribbon or lace…   
I shared this idea a few years ago, so do hop over to this post to see how to wrap your soaps with fabric…


Beautiful paper is of course lovely for wrapping soaps in, and I like to use good quality scrapbook paper…  
Wrap your soaps as you would a gift, and add ribbon or lace if you wish… 


A little strip of patterned paper is also lovely around soap, and is handy as recipients can see straight away what it looks (and smells!) like!  
This is our coffee soap, which is scented with vanilla essential oil and contains fresh coffee grounds…


 Broad lace…ah, just gorgeous for wrapping soaps!
Secure lace at the bottom of the soap with double-sided tape...


…A white doily and some narrow pink ribbon…a pretty and simple way to wrap a soap!  


…Or simply decorate with dried flowers such as rose buds which we placed on top of our rose scented soap…

~

Do you have any lovely ideas for decorating and wrapping handmade soaps…?

~

May each of you have a truly blessed weekend further!
 

 ~

  This post may be shared with...

Sunday, January 10, 2016

Birthday Blessings...

Oh, are these not the most charming floral sewing tins...?

Perfect for storing sewing goodies in and oh!  So beautiful and decorative in the sewing room...


My mom and dad sweetly gifted me with these lovelies for my nineteenth birthday last Sunday...I am hoping to do my sewing corner up a little bit this coming year, and these will be a delightful addition!


My dear sister, Nancy, made me these two adorable crocheted baskets which I will use to store my buttons, bobbins and other little sewing things in!


It is my hope to finally purchase my own sewing machine at the end of this month, my friends...I simply cannot wait to share the exciting news with you when it occurs...{{smiles}}

Until then, I am enjoying picking up some sewing work again and filling my market stall which is somewhat empty at this time of year!

~
And dear friends...I was truly touched by all your sweet, heartfelt birthday emails and comments you sent me...thank you ever so much...they put a big smile on my face!

~
Praying you have a truly blessed week...may it be creative too!

"Every good gift and every perfcet gift is from above, and cometh down from the Father of lights, with whom is no variableness, neither shadow or turning."

~ James 1:17, KJV